Step-by-Step Guide to Setting Up Lead Routing in Your CRM
I burned half of Monday debugging why leads from California were being assigned to our sales rep in London. The webhook from our lead form was firing perfectly, but the n8n workflow was choking on the state abbreviation “CA” instead of the full name “California” which our CRM expects. A classic data mismatch that sent a high-intent lead on a 5,000-mile detour. This is why building your own routing logic beats the pants off the rigid, black-box systems built into most CRMs.
The Inbound Webhook: Your Single Point of Truth
Everything starts with the data you get. We use a simple webhook URL from an n8n workflow as the destination for all our website form submissions. No third-party form processors, no Zapier, just a direct POST request. This gives us raw, unfiltered control over the payload before it ever touches the CRM. Trying to clean up data after it’s in the CRM is a fool’s errand.
The first thing to do is inspect the incoming JSON. Don’t assume anything. Our form platform sends a payload that looks something like this, with all the UTM parameters helpfully nested, which is nice until you need to parse them.
{
  "lead": {
    "name": "John Doe",
    "email": "j.doe@examplecorp.com",
    "company_size": "50-100",
    "location": {
      "state": "CA",
      "country": "USA"
    }
  },
  "source": {
    "utm_campaign": "q4_enterprise_push",
    "utm_source": "google_ads",
    "form_id": "contact_form_v2"
  }
}
See that `location.state` field? That was the culprit. Our CRM API requires a full state name, not the abbreviation. So, step one is always a data transformation and sanitization step.
Data Normalization is Not Optional
I handle this with a simple Code node in n8n. You could build a massive Switch node, but that’s messy and unscalable. JavaScript is cleaner. I maintain a simple mapping object to translate state codes to full names. This approach also lets me handle other common data problems, like standardizing “United States”, “USA”, and “US” to a single format.
This little block of code has saved me countless hours. It takes the input, finds a match in the `stateMap`, and either returns the full name or the original input if no match is found. This prevents the workflow from failing completely if a new or unexpected value appears.
const stateMap = {
  "AL": "Alabama",
  "AK": "Alaska",
  "AZ": "Arizona",
  "AR": "Arkansas",
  "CA": "California",
  // ... and so on for all 50 states
};

// Get the state code from the incoming JSON
const stateCode = $json.lead.location.state.toUpperCase();

// Find the full name, or use the original code as a fallback
const fullStateName = stateMap[stateCode] || stateCode;

// Return the corrected data for the next node
return {
  ...$json,
  lead: {
    ...$json.lead,
    location: {
      ...$json.lead.location,
      state: fullStateName
    }
  }
};
Now the data is clean. The next step is deciding where it goes.
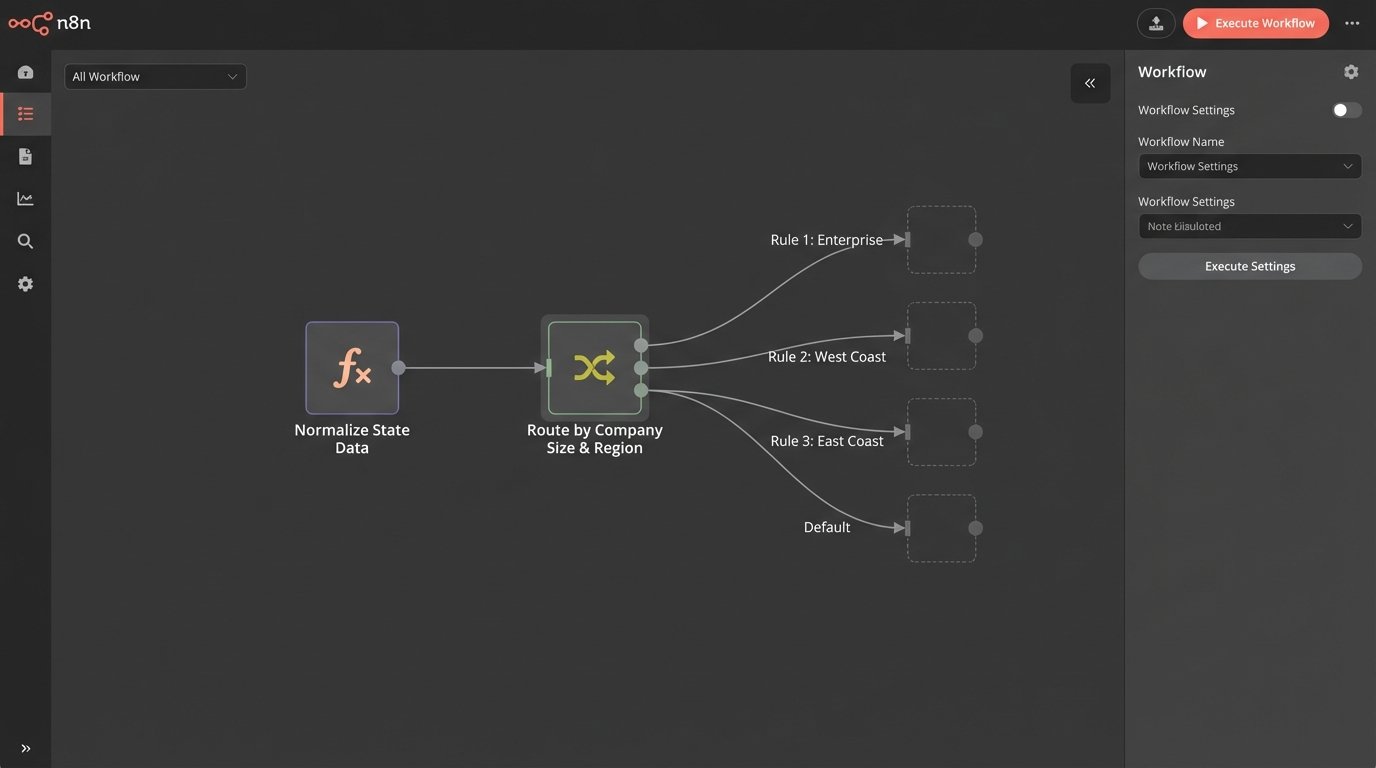
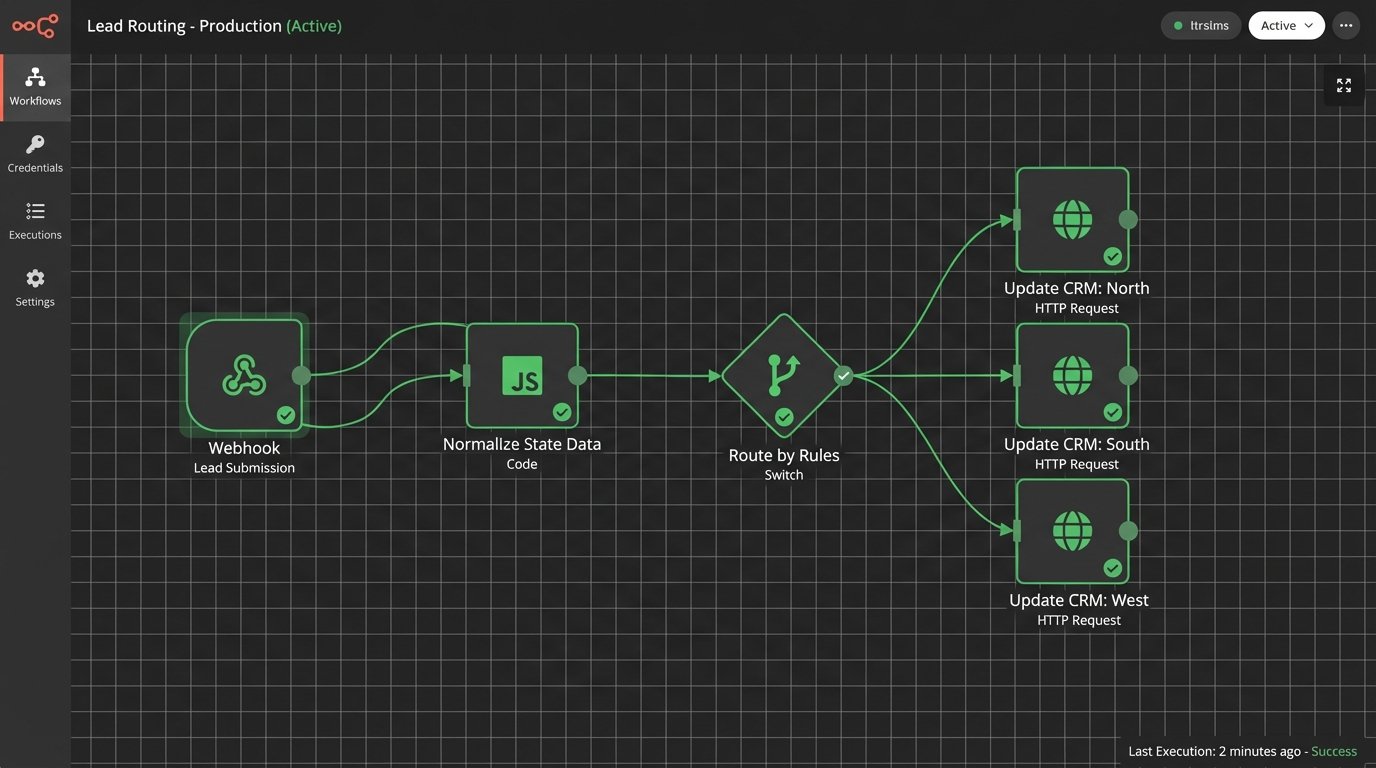
The Routing Logic: A Glorified Switch Node
Once the data is standardized, the actual routing logic begins. People overcomplicate this. For 90% of use cases, you don’t need a complex load-balancing algorithm or AI-powered assignment. You need a clear, rules-based system that is easy to debug. I prefer n8n’s Switch node for this because it’s visual. You can see the flow of logic at a glance, which is impossible with a 200-line `if/else` block in some proprietary CRM workflow builder.
My Switch node operates on a few simple rules, checked in order of priority.
Rule 1: Enterprise Leads First
The highest priority rule checks the `company_size` field. If it matches our enterprise segments (“500-1000” or “1000+”), that lead goes directly to our two senior reps. We have a simple round-robin for this subset. I use a static variable stored in n8n that just increments on each run and uses a modulo operator to decide between rep A or rep B. It’s crude, but it works, and it ensures our most valuable leads get immediate attention from the right people.
Rule 2: Geographic Territory Assignment
If the lead isn’t enterprise-level, the Switch node checks geography. This is where our cleaned `state` field from the previous step is critical.
- West Coast: If `lead.location.state` is California, Oregon, or Washington, assign to Rep C.
- East Coast: If `lead.location.state` is New York, Massachusetts, or Florida, assign to Rep D.
- Central: If `lead.location.state` is Texas or Illinois, assign to Rep E.
This covers the bulk of our inbound volume. Each of these conditions points to a different branch in the workflow.
The Default Fallback: A Simple Round-Robin
What about leads that don’t match any criteria? A lead from Idaho or a company with 200 employees would pass through all the specific rules. This is where the Default output on the Switch node is essential. All unmatched leads go to a general pool of junior sales reps. Here, I use another simple counter to distribute them evenly. It’s not perfect load balancing because it doesn’t account for rep capacity or time zones, but it’s a massive improvement over manual assignment and prevents any lead from getting lost.
Pushing to the CRM API
Each branch of the Switch node ends with an HTTP Request node configured to hit our CRM’s API. This is the final step: creating the contact, company, and deal records. It’s just a POST request to an endpoint like `https://api.crm.com/v3/objects/contacts`.
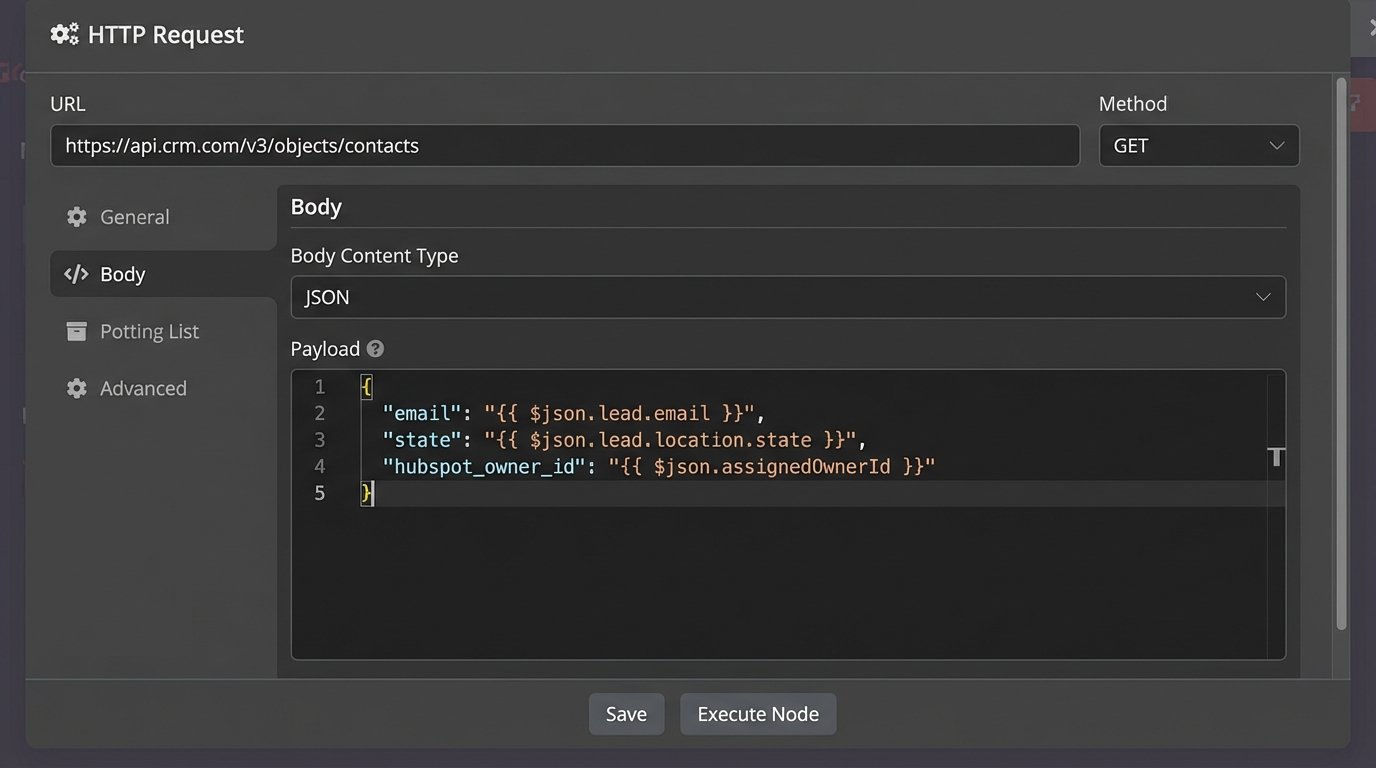
The key here is constructing the correct JSON body for the API call. After all the routing logic, I have the lead data and the ID of the assigned owner. The final node merges this information into a single, clean payload ready for the CRM.
Mapping Fields and Creating the Record
You have to map your internal data structure to the one the CRM expects. The CRM API documentation is your best friend here. Our final JSON payload before sending looks something like this. Notice how we are setting the `hubspot_owner_id` property based on the logic from our Switch node. We also flatten the UTM data into top-level custom properties for easier reporting inside the CRM.
{
  "properties": {
    "email": "{{ $json.lead.email }}",
    "firstname": "{{ $json.lead.name.split(' ')[0] }}",
    "lastname": "{{ $json.lead.name.split(' ').slice(1).join(' ') }}",
    "state": "{{ $json.lead.location.state }}",
    "company_size": "{{ $json.lead.company_size }}",
    "utm_campaign": "{{ $json.source.utm_campaign }}",
    "utm_source": "{{ $json.source.utm_source }}",
    "hubspot_owner_id": "{{ $json.assignedOwnerId }}"
  }
}
This HTTP Request node is the last step. I’ve added error handling on this node as well. If the API call fails for any reason (like a server error or an invalid email), the workflow sends a notification to a dedicated Slack channel with the error message and the original lead payload. This ensures no lead is ever truly lost, even when the tech fails. It creates a manual task for me to fix, but that’s far better than a potential customer waiting in silence.