Using Calendly out of the box is like building a dam with a hole in it. You capture leads, sure, but the data just sits there. It creates a manual task downstream where someone has to copy-paste that information into a CRM, a project board, or a spreadsheet. This process is slow, error-prone, and a complete waste of technical talent. The real work begins after the booking, and that’s the part that demands automation.
The goal is to force Calendly to act as a proper trigger, not a data silo. We will use webhooks to inject booking data directly into a business workflow the moment it happens. This guide covers the architecture for stripping data from Calendly and pushing it into a system that does actual work, bypassing the manual drag of data entry.
Prerequisites: The Groundwork Before the Code
Before writing a single line of code, you need to structure the data at its source. If you allow garbage into the booking form, you will be automating the distribution of garbage. It’s a simple, brutal truth that most how-to guides conveniently ignore.
Calendly Configuration for Automation
Your Calendly event types are your input forms. Every field matters. Use the “Custom Questions” feature to capture the specific data points your destination system requires. Do not rely on a generic “notes” field. Force structured input with dropdowns, radio buttons, and required text fields. If you need to separate a first name and a last name for your CRM, create two distinct fields for them on the Calendly form. Don’t make a script guess where one name ends and the other begins.
This upfront rigor prevents massive headaches in the data transformation stage.
API Access and the Paywall
Webhooks in Calendly are not free. They are locked behind their “Standard” subscription or higher. This is the pay-to-play nature of serious automation. Once you’re on a paid plan, generate a personal access token from your account settings. This token is your key for authenticating API requests and, more importantly, for setting up the webhook subscription itself. Guard it properly.
The Destination System and Middleware
Decide where the data needs to go. Is it a HubSpot contact record? A new row in a Google Sheet? A Trello card? The destination’s API documentation is now your primary source of truth. You need to know the exact endpoint, the required fields, and the authentication method (API Key, OAuth2, etc.).
A bridge is required to catch the webhook from Calendly, reshape it, and forward it. You can use a low-code wallet-drainer like Zapier or Make for this, but for control and scalability, a serverless function is the superior choice. We will use an AWS Lambda function written in Node.js. It’s cheap, fast, and forces you to understand the mechanics of what you’re building.

Configuration: Building the Data Pipeline
This is the core of the build. We will create the webhook, build the listener to catch the data, transform it into a useful format, and then push it to its final destination. One broken link in this chain and the whole thing fails silently.
Creating the Calendly Webhook
Navigate to the “Integrations” section of your Calendly account and select “Webhooks.” You’ll create a subscription that points to the URL of your yet-to-be-created Lambda function. You must subscribe to two specific events: invitee.created for new bookings and invitee.canceled for cancellations. Missing the cancellation event leads to data rot in your destination system, filled with appointments that no longer exist.
Calendly provides a signing key for the webhook. This is used to verify that the requests hitting your endpoint are genuinely from Calendly and not a malicious actor. We will use this key in our function to validate the payload.
Building the Webhook Listener with AWS Lambda
A Lambda function is the perfect middleware here. It only runs when triggered by an HTTP request, and you only pay for the milliseconds it’s active. We’ll use the Serverless Framework to define and deploy the function, as it strips away much of the manual configuration boilerplate in AWS.
The function’s job is threefold:
- Receive the POST request from Calendly.
- Validate the request signature to confirm its origin.
- Parse the JSON payload and extract the necessary data.
Here is a basic Node.js function structure for an AWS Lambda handler that performs these steps. This is a skeleton, not a production-ready script, but it shows the critical logic paths.
const crypto = require('crypto');
// Store your webhook signing key securely (e.g., in AWS Secrets Manager)
const CALENDLY_SIGNING_KEY = process.env.CALENDLY_SIGNING_KEY;
exports.handler = async (event) => {
// 1. Signature Validation
const calendlySignature = event.headers['calendly-webhook-signature'];
if (!calendlySignature) {
console.error('Missing Calendly signature');
return { statusCode: 400, body: 'Bad Request' };
}
const { t, signature } = calendlySignature.split(',').reduce((acc, part) => {
const [key, value] = part.split('=');
acc[key] = value;
return acc;
}, {});
const signedPayload = `${t}.${event.body}`;
const expectedSignature = crypto
.createHmac('sha256', CALENDLY_SIGNING_KEY)
.update(signedPayload, 'utf8')
.digest('hex');
if (crypto.timingSafeEqual(Buffer.from(signature), Buffer.from(expectedSignature))) {
console.log('Signature validated successfully.');
} else {
console.error('Invalid signature.');
return { statusCode: 403, body: 'Forbidden' };
}
// 2. Payload Parsing
const body = JSON.parse(event.body);
const eventType = body.event; // e.g., 'invitee.created' or 'invitee.canceled'
if (eventType === 'invitee.created') {
// Logic for new appointments
const invitee = body.payload.invitee;
const answers = body.payload.questions_and_answers;
const contactData = {
name: invitee.name,
email: invitee.email,
meetingTime: body.payload.event.start_time,
// Extract custom question answers here
};
// TODO: Call your CRM API with contactData
console.log('Processing new booking:', contactData);
} else if (eventType === 'invitee.canceled') {
// Logic for canceled appointments
const inviteeEmail = body.payload.invitee.email;
// TODO: Find user in CRM by email and update status
console.log(`Processing cancellation for: ${inviteeEmail}`);
}
return {
statusCode: 200,
body: JSON.stringify({ message: 'Webhook processed' }),
};
};
Deploying this requires setting up an API Gateway trigger for the Lambda, which provides the public URL you give to Calendly.
Data Transformation Logic
The raw payload from Calendly is verbose. Your CRM needs a clean, specific object. This is the mapping step. You must strip the incoming JSON down to its essential parts and restructure it for the destination API.
For example, HubSpot’s API expects a contact properties object. You would construct it like this:
// Inside your Lambda, after parsing the payload

const hubspotPayload = {

    properties: {

        firstname: invitee.name.split(' ')[0], // A risky assumption, better to have separate fields

        lastname: invitee.name.split(' ').slice(1).join(' '),

        email: invitee.email,

        meeting_scheduled_time: body.payload.event.start_time

    }

};
// Now make the API call to HubSpot with this payload
// const response = await axios.post(HUBSPOT_API_ENDPOINT, hubspotPayload, { headers });
Notice the split on the name. This is brittle. This is why structured input on the Calendly form is not optional. It’s a requirement for reliable automation.
Advanced Logic and Failure Proofing
Getting a single booking into a CRM is simple. Building a system that doesn’t break under pressure or create duplicate data requires more thought. This is what separates a quick demo from a production-ready tool.
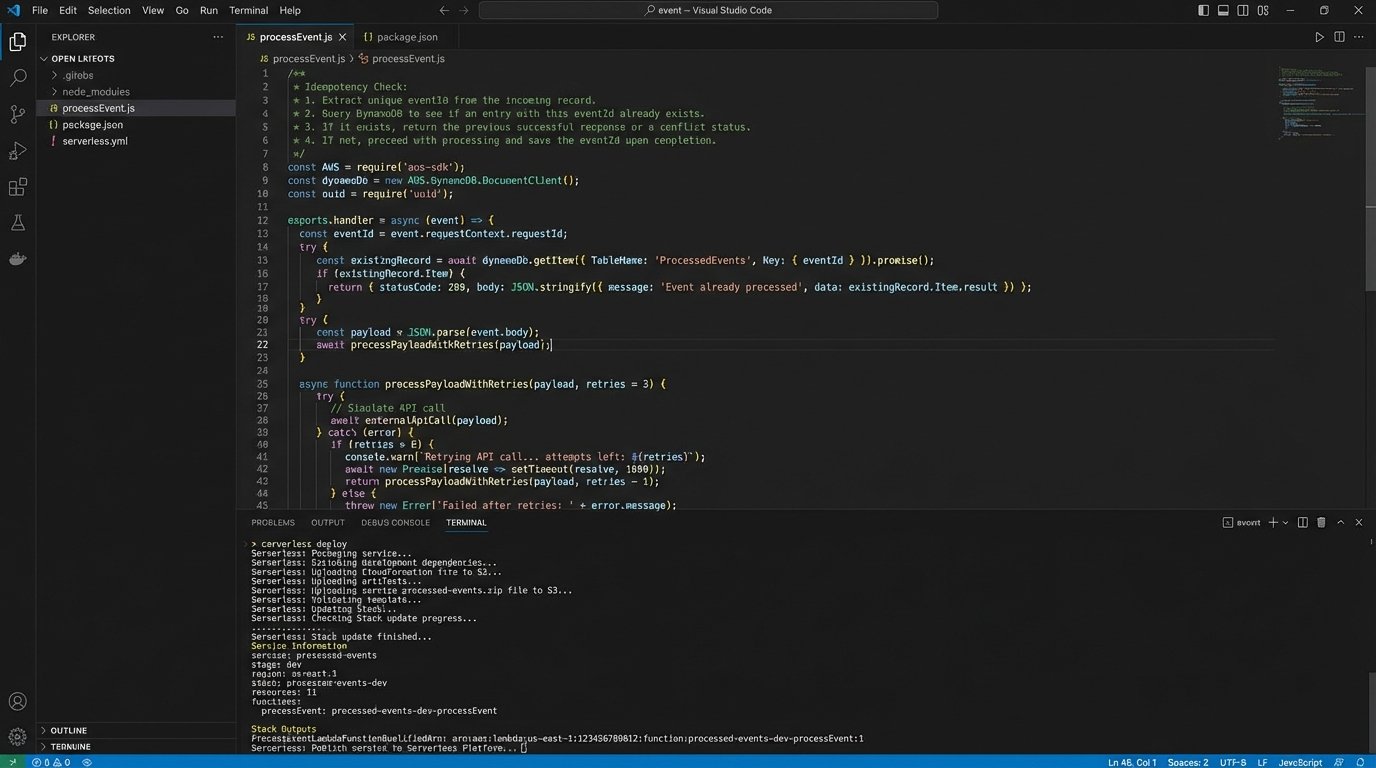
Handling Idempotency
Network issues can cause Calendly to send the same webhook more than once. If your function just blindly creates a new contact, you’ll end up with duplicates. To prevent this, use the unique event UUID from the Calendly payload (`body.payload.event.uuid`). Before creating a new record, check a database or cache (like DynamoDB or Redis) to see if you’ve already processed this UUID. If you have, you ignore the request. This makes your operation idempotent.
Rate Limiting and Retries
Your destination system’s API has a request limit. If you get a burst of 100 bookings in a minute, your naive function will hammer the API and get throttled. Your API calls must be wrapped in a try-catch block. On a rate-limit error (usually a 429 status code), the function should implement a simple retry strategy with exponential backoff. If it still fails after a few retries, push the failed event payload to an SQS dead-letter queue (DLQ). This saves the event for manual inspection and reprocessing later, ensuring no data is lost.
A silent failure is a data-loss event.
Post-Booking Workflows
Creating a contact record is just the start. The real value comes from triggering other actions. Treating your data pipeline like plumbing is the first step. If the pipes are clogged with bad data at the source, no amount of pressure from the webhook will force it through to the CRM cleanly. Once the data is flowing, you can add more taps.
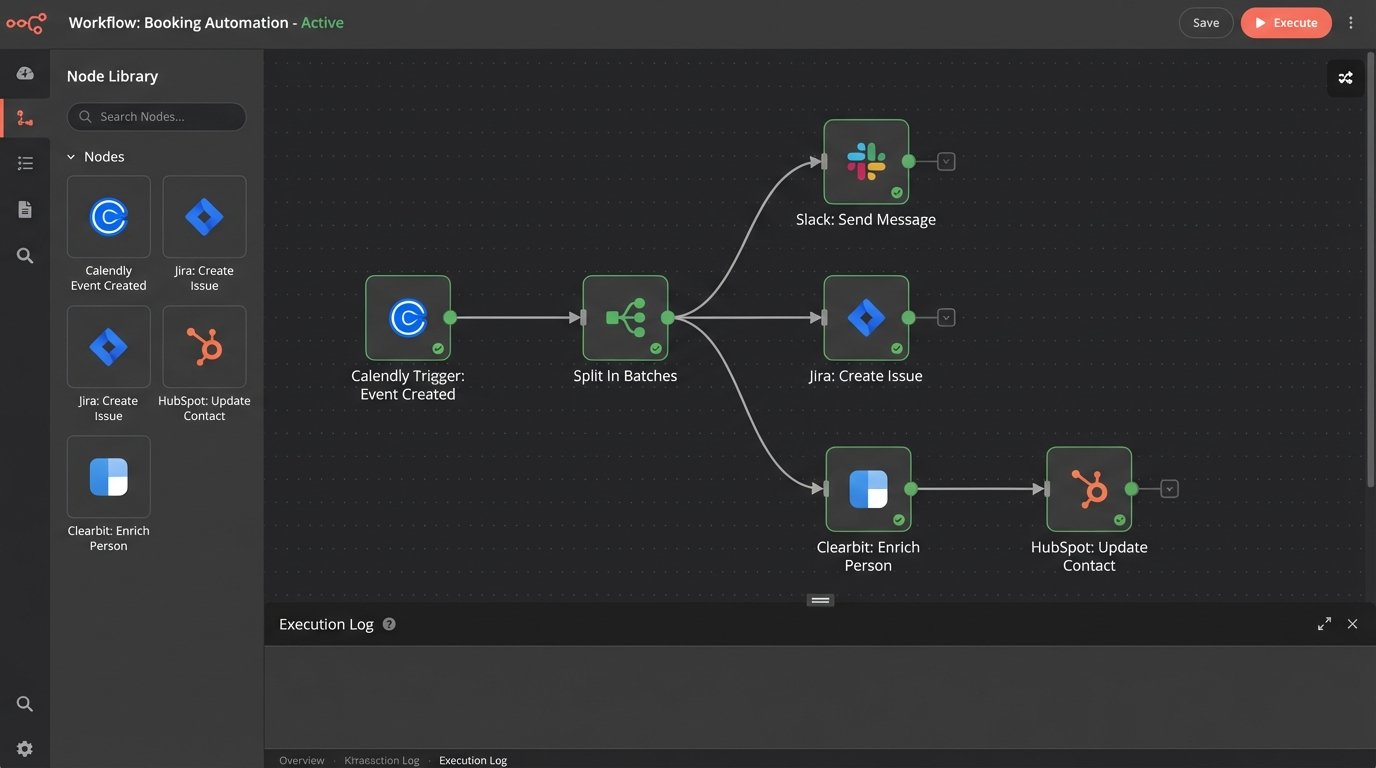
Here are a few high-impact secondary automations:
- Internal Notifications: Use the data to construct a formatted message and post it to a specific Slack channel using Slack’s API. This alerts the sales or service team immediately.
- Project Management: Create a task or card in Jira, Asana, or Trello and assign it to the team member who will take the meeting. Include the booking details in the card description.
- Data Enrichment: Take the invitee’s email and pass it to an enrichment service like Clearbit. The returned data (company size, location, job title) can then be used to update the CRM record, giving your team critical context before the meeting.
Validation and Monitoring: The System Is Not Your Friend
Never assume your automation is working just because you didn’t get an error message. You must actively monitor its health and validate its output. Trust is earned through logs and successful end-to-end tests, not hope.
End-to-End Testing
Book an appointment yourself using the public Calendly link. Don’t mock the data. Use the real system from start to finish. Tail the logs in AWS CloudWatch to see the execution in real-time. Did the function trigger? Did it parse the data correctly? Did it receive a 200 or 201 response from the destination API? Finally, check the CRM. Is the new contact there? Are all the fields populated correctly? Repeat this for a cancellation. The entire chain must be verified.
Aggressive Logging
Your Lambda function’s logs are your only lifeline when something breaks. Log the critical parts of the process: the incoming event body (be careful with PII), the transformed object you’re about to send, and the response from the destination API. When a user says their booking “didn’t show up in the system,” these logs are the difference between a five-minute fix and a five-hour investigation.
Alerting on Failures
Configure alerting for your Lambda function. If it times out, runs out of memory, or encounters an unhandled exception, it should trigger an alarm. Connect this CloudWatch Alarm to an SNS topic that sends an email or a PagerDuty notification. A silent failure is unacceptable in a core business process. The system must scream when it’s broken.